How To Install Vinyl Plank Flooring
how to install Stainmaster vinyl plank flooring


- Let planks acclimate for 48 hours
- Start installation from room’s corner
- Use spacers for expansion gaps
- Ensure subfloor is clean and level
- Plan staggered layout before starting
- Cut planks using utility knife
- Snap planks together using angle method
- Maintain 6-inch seam offset minimum
- Use tapping block for tight fit
- Check for moisture on concrete subfloor
- Use underlayment if not pre-attached
- Remove baseboards before laying flooring
- Measure twice, cut once accurately
- Avoid placing seams near doorways
- Use jigsaw for odd-shaped cuts
- Leave 1/4-inch space around perimeter
- Clean floor before final touches
- Install transition strips at thresholds
- Reinstall trim to cover expansion gap
- Follow manufacturer’s specific installation instructions
Step-by-Step Guide
Vinyl plank flooring is a popular, budget-friendly option that delivers the appearance of hardwood without the high cost or maintenance. Whether you’re renovating a single room or outfitting an entire home, installing vinyl plank flooring can be a satisfying DIY project especially with the right preparation. Here’s everything you need to know to get started.
Step 1: Gather Your Tools and Materials
Before installation, gather the necessary tools:
Utility knife
Tape measure
Spacers
Rubber mallet
Tapping block
Straight edge or T-square
Underlayment (if required)
Many vinyl planks come with a click-lock system and pre-attached underlayment. Check the product details to determine if additional materials are needed.
Step 2: Prepare the Subfloor
Ensure your subfloor is clean, dry, and level. Vinyl plank flooring can be installed over concrete, wood, tile, and even some existing vinyl so long as the surface is smooth and free of debris. For concrete floors, a moisture barrier may be necessary.
Step 3: Acclimate the Flooring
Let the vinyl planks sit in the room where they’ll be installed for at least 48 hours. This helps them adjust to the temperature and humidity, preventing expansion or contraction after installation.
Step 4: Plan the Layout
Measure your space and use a chalk line to mark the center. Dry-lay a few rows to plan the stagger and minimize cuts at walls. A natural staggered look helps with aesthetics and floor integrity.
Step 5: Install the First Row
Start in a left corner with the tongue side facing the wall. Use spacers to maintain a 1/4″ gap for expansion. Connect planks by angling and snapping them together, using a tapping block for a snug fit. Cut end pieces with a utility knife and straight edge.
Step 6: Continue the Installation
Begin each new row with the cut piece from the previous row if it’s at least 6″ long. Maintain a staggered seam pattern of at least 6–8 inches. Use spacers along all walls and door frames.
Step 7: Cut Around Obstacles
For door frames, pipes, or other obstacles, measure carefully and use a jigsaw or utility knife to shape the plank. Patience and precision here will ensure a professional look.
Step 8: Finishing Touches
Once all planks are installed, remove spacers and install baseboards or quarter-round molding to cover the expansion gap. Avoid nailing into the planks themselves.
Bonus Tips:
For stairs, use adhesive vinyl planks and stair nosing for safety.
For glue-down methods, ensure adhesive compatibility and follow curing instructions.
Always refer to your product’s installation manual for best practices.
| Brand | LVP-InstallPro |
| Finish | Wood, Stone, or Matte Look (Varies by Plank Style) |
| Material | Luxury Vinyl Plank (LVP) – SPC/WPC Core |
| Product Type | Interlocking Vinyl Plank Flooring |
| Installation Method | DIY-friendly Click-Lock Floating Installation No glue or nails required |
| Subfloor Compatibility | Installs over most existing surfaces including concrete, wood, tile, and vinyl |
| Underlayment Requirement | May include pre-attached backing; if not, use approved moisture barrier or padding for sound absorption |
| Preparation Required | Surface must be clean, level, dry, and smooth – use leveling compound as needed |
| Room Suitability | Ideal for kitchens, bathrooms, basements, and high-moisture areas |
| Cutting Method | Scoring and snapping with utility knife, or use of fine-tooth saw for precise cuts |
| Acclimation Period | Allow 24-48 hours in room temperature environment before installation |
| Plank Orientation | Recommended to lay planks parallel to the longest wall or main light source |
| Expansion Gap | Maintain a 1/4-inch gap around walls and fixed objects to allow expansion |
| Edge Style | Micro-beveled or square edge depending on product selected |
| Tools Needed | Tape measure, utility knife, spacers, tapping block, pull bar, rubber mallet |
| Cleaning Post-Installation | Sweep and damp mop; avoid wet mopping for 24 hours post-installation |
| Installation Time Estimate | 100 300 sq ft per day for DIY installations |
| Professional Help | Not required but optional for complex layouts or transitions |
Installing Stainmaster vinyl plank flooring correctly is crucial to ensure the longevity and validity of its warranty. Adhering to the manufacturer’s guidelines not only guarantees optimal performance but also safeguards your investment.
Subfloor Preparation
Before installation, ensure the subfloor is clean, dry, and level. For concrete substrates, the surface must be free of contaminants and structurally sound. If necessary, use a suitable, moisture-resistant leveling compound. Wood subfloors should be dry and compliant with regional moisture content standards. Avoid installing over existing adhesives or radiant heating elements. Proper subfloor preparation is essential to prevent issues that could void the warranty .
Acclimation and Environmental Conditions
Acclimate the flooring in the installation area for at least 48 hours to allow it to adjust to the room’s temperature and humidity. Maintain an ambient temperature between 60°F and 80°F during and after installation. Failure to acclimate the product properly can lead to expansion or contraction, potentially affecting the floor’s integrity and warranty coverage .
Installation Guidelines
Use the recommended tools and follow the manufacturer’s installation instructions meticulously. Ensure an expansion gap of at least 1/4 inch around the perimeter of the room. For areas exceeding 50 feet in length or width, increase the gap to 1/2 inch. Proper expansion gaps accommodate natural movement and prevent buckling, which is vital for maintaining warranty validity.
Wet Area Considerations
In moisture-prone areas like bathrooms and kitchens, additional precautions are necessary. Install a 6-mil polyethylene sheet beneath the flooring, extending it 2 inches up the walls. Seal all seams and perimeters with 100% silicone caulk to prevent water infiltration. These measures protect the subfloor and are often required for warranty coverage in wet areas.
Warranty Coverage
When installed and maintained according to guidelines, vinyl plank flooring typically offers a lifetime residential wear warranty and a 20-year light commercial wear warranty. The waterproof warranty ensures the product remains unaffected by surface spills and damp cleaning. However, damage from flooding or improper installation is excluded. Adhering to installation and maintenance instructions is essential to uphold warranty protections.
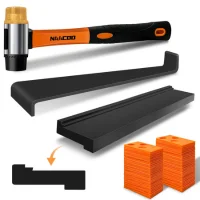
Laminate/Vinyl Flooring Tools, NAACOO Tapping Block for Vinyl Plank Flooring – Double Sided with Notches, Pull Bar, 40Pcs Floor Spacers, Rubber Mallet. Universal Floor
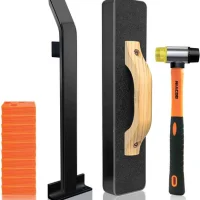
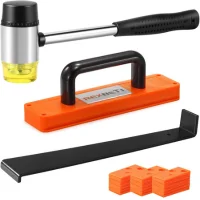
Laminate/Vinyl Flooring Tools, NAACOO Heavy Tapping Block for Vinyl Plank Floor – Knock 1-2 Times, Heavy Pull Bar, 40pc Flooring Spacers, Rubber Mallet – 4 in 1 Floor Installation Kit

Laminate Flooring Tools, NAACOO LVP Installation Kit, Professional Vinyl Flooring Tools – Tapping Block with Handle, 10” Contour Gauge, Pull Bar, 2 in 1
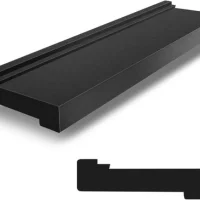
Tapping Block for Vinyl Plank Flooring, NAACOO Laminate Flooring Tools – Universal Tapping Block with 3 Different Edges. Use for Floor Installation
REXBETI Laminate Wood Flooring Installation Kit, LVP Installation Kit, Vinyl Flooring Tools – Tapping Block with Handle, Pull Bar, Double-Faced Mallet